SIGHTRON Ambassador Adam Migel won first place at the 2026 Rocky Mountain Airgun Challenge Speed Challenge in Utah using the SIGHTRON S-TAC 1-6x24 AR1 Riflescope. The event, hosted by Utah Airguns at the Garth Killpack Shooting Range, featured competitive airgun shooters competing for a $100,000 prize purse.
KDG, headquartered in Seymour, Connecticut, has completed its brand transition and is accelerating product development with a focus on innovation and American manufacturing. The company plans to expand its Kinect and SideLok product lines while introducing new categories, with all products designed and manufactured in the United States.
ATN Corp released a major firmware update for the ATN ThOR 6 Elite thermal rifle scope, improving image quality, SharpIR processing, digital zoom clarity, and battery recognition. The free update is available through the ATN Connect 6 app or USB-C for all ThOR 6 Elite owners.
Stealth Cam launches its upgraded 3.0 Series cellular trail cameras featuring AI-powered false image detection, PIR zone selection, and Rack Alert technology. The Deceptor MAX 3.0, Revolver PRO 3.0, Spectre 4K Pro, and Fusion MAX 3.0 models offer dual-core technology for simultaneous image and video capture with free 4K downloads via the Command app.
If you’ve been in the precision shooting game for a while, you probably remember the old days when we dreamed about having something as simple as a scope with matching turrets and reticle. I remember wanting to build a custom long-range rifle and put a true long-range scope on it.
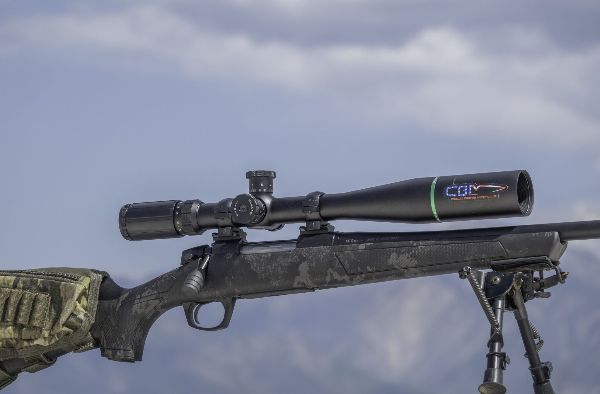
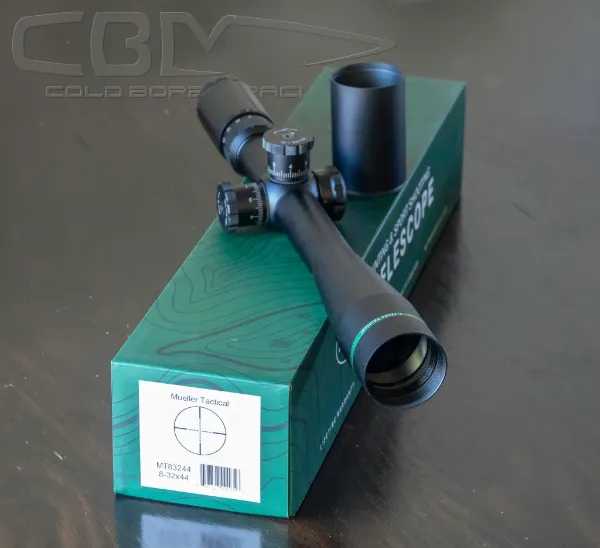
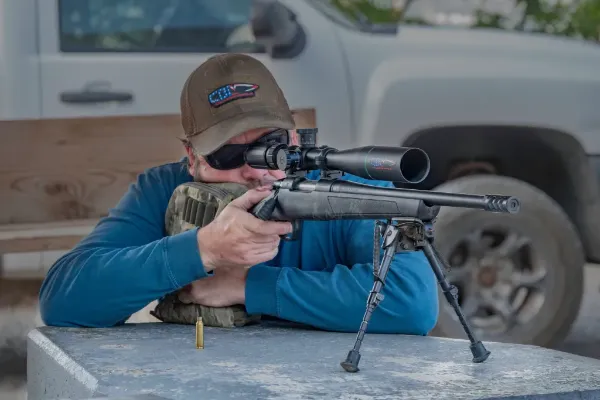
Today we’re taking a look at a scope that embraces that traditional design. The Mueller Optics 8-32×44 tactical rifle scope with side focus matches what I wished for. Let’s see how this scope stacks up against its contemporary challengers.
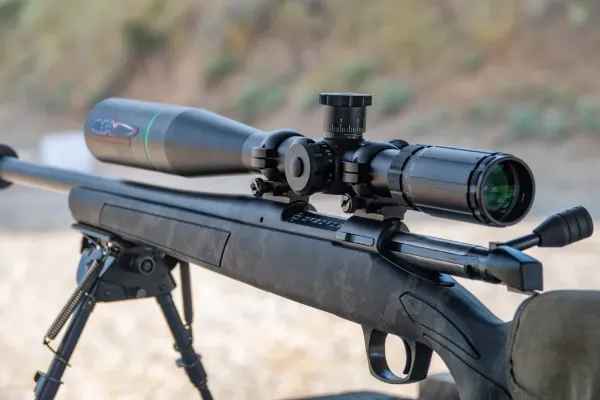
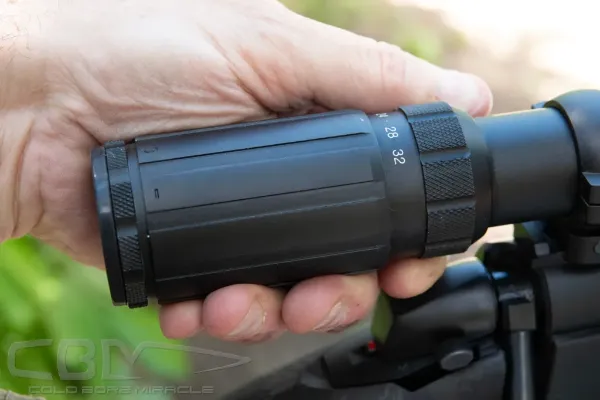
This scope is built on a 30mm tube with a 44mm objective lens. The slightly smaller objective allows closer mounting which some folks see as an advantage. It uses a four power zoom, from 8x up to 32x.
One of the key features of this scope is the side focus which, believe it or not, wasn’t always as popular as it is now. We call them side focus, also known as the parallax adjustment. This allows the shooter to clarify the target detail while at the same time removing parallax from the view of the target. It’s an important feature needing adjustment when shooting long-range.
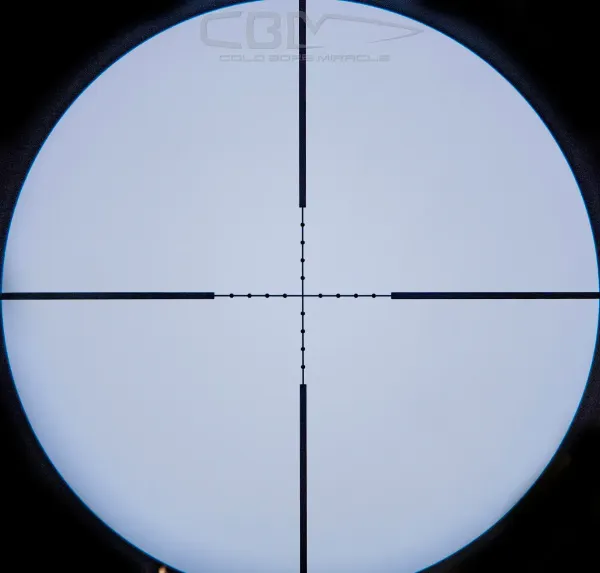
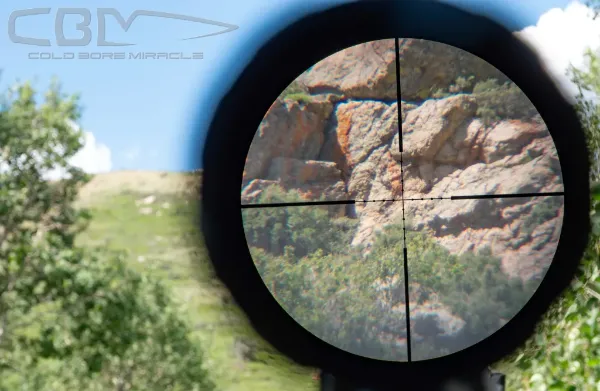
Inside the Mueller 8-32X you’ll find a traditional MIL-dot reticle. The original “tactical” reticle, a MIL-dot uses milliradian graduations that the marksman can use for measuring distance, target sizes, as well as corrective movements when shooting at long-range.
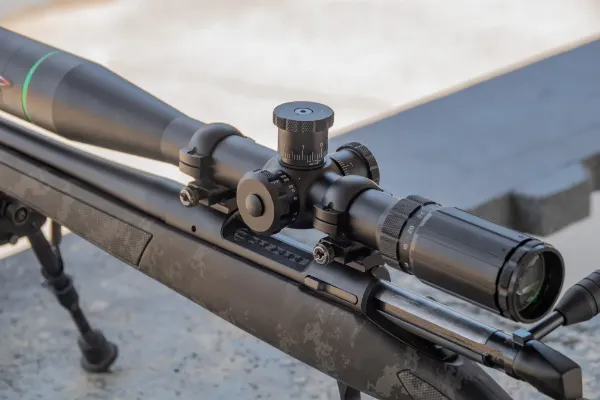
The reticle is housed in an erector that uses 1/8 MOA turrets. That’s a much finer graduation than what most scopes use today. Adjusting at 1/8 MOA per click gives a total of 7.5 MOA of travel per rotation of the turret.
Fine knurling of the control surfaces make adjusting the scope easy. And a diopter on the occular housing allows for fine reticle focus to give optimal clarity. The scope comes with a bikini cover, and a three-inch sun shade.
As I opened the box containing the scope, I felt like a kid on Christmas. This scope has an MSRP of $299.95, which is very achievable for most aspiring marksman these days. And considering that price, it looked like a good value.
I immediately took it outside to do a little spying on the neighborhood to evaluate the image quality. An 8-32 has always been a bit touchy in my opinion, when you try and smoosh all that detail through a small lens you lose some brightness. But thats to be expected, as seen in most every scope I’ve used. The top end of magnification as typical is a bit dimmer than you’d hope. This is almost never an issue for me, as I rarely use scopes at max power. Especially if its 32x.
The focus/parallax adjustment was smooth and allowed very precise adjustment. Its rotation is much broader than expected, and allows adjustment all the way down to 10 yards. That will come in handy for those looking to use it on rimfires and air rifles.
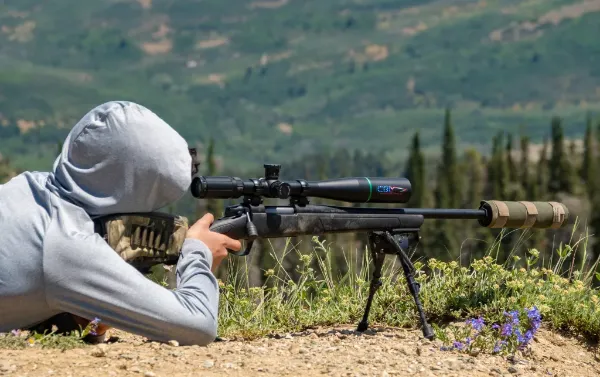
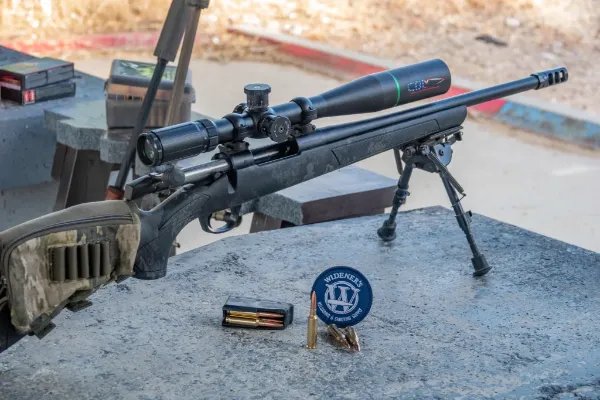
I had chosen to mount the scope on a CVA Cascade SB 6.5 Creedmoor. I have used the rifle extensively for testing various scopes, and it would be a good host for this one as well. I attached the scope using a set of Vortex 30mm low rings. Even so, the scope was a touch higher than I’d like for my cheek weld, so I also installed one of my Triad Tactical stock packs. It allows spacers to be added to increase comb height, and the comfortable fabric feels soft against your face.
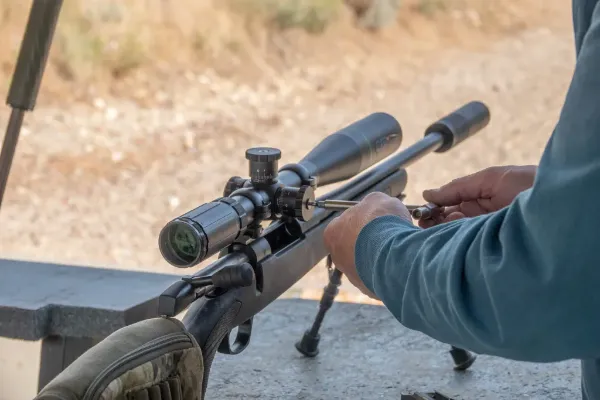
With eye relief set, and the scope leveled I torqued down the screws. With the rifle set firmly on my kitchen table, I removed the bolt and did a quick bore-sight job in preparation of the first range trip. Then I grabbed some ammo and the rest of my gear before heading to the firing line.
I typically zero my rifles at 100 yards, and this one would be no different. After firing my initial shot, I put a second one downrange to confirm before adjusting the reticle from where I had aimed, to the two bullet holes in the paper. I fired a third shot that grouped perfectly with the other two. With a solid zero, I fired a few three-shot groups to confirm both my own stability and the accuracy with the rifle. Then it was time to stretch it out some and see how the Mueller does at distance.
Thanks to Wideners Shooting Supply for supplying ammunition for this review
Seeing squirrels running around downrange gave a good idea of how sharp an image I could expect in the field. At two hundred yards they would have been easy pickings should I have felt more bloodlust. But instead, I removed the turret screws and zeroed them out. That would give me a solid zero that I could anticipate retuning to after adjusting the scope for further distances.
I’m not built for shooting at public ranges, so most of my shooting takes place in the wild Rocky Mountains where I spend most of my spare time. That’s where I would do most of my shooting with the Mueller Tactical scope.
Like many scopes with a high magnification range, this one lost some brightness and detail at maximum power. Most scopes suffer from this issue, though when lower quality lenses are used, it’s more apparent. I don’t worry too much about it. I have other scopes like 5-30X and 6-36X, and I simply don’t zoom to the max power. A 5-30X scope at 25X looks better than a 5-25X scope at 25X.
This scope looks just fine for almost anything I would use it for when I zoom it in to about 25-28X. And the parallax adjustment makes it possible to fine tune it for a very clean image. I suppose if this scope had a 50mm or 56mm objective lens it might be a touch brighter at high magnifications, but if wishes were fishes…
As it stands, the Mueller 8-32×44 provides plenty of clear imagery for sighting in on a target. And considering its very affordable price, I think it does a fine job for those looking to punch targets at longer distances or shoot tiny varmints out on a prairie.
The control surfaces of this scope are great, making it easy to operate. The turrets are a little finer adjusting than I’m used to, but that’s okay. They’re still suitable for making corrections for distance, though if you were shooting beyond 500 to 600 yards, it might become a bit tedious turning the turret so much.
Second focal plane scopes like this are pretty simple in their design, so there’s less to go wrong. And another benefit is they weigh less and are less expensive. Mueller Optics has a simple warranty much like the rest of the industry covering nearly anything beside willing misuse or acts of your chosen deity.
Dialing the scope from my zero to max elevation and back many times over the course of testing showed a solid return to zero. No skips or delays in travel. There appear to be six full revolutions of the elevation turret, and after zeroing the scope to my rifle I had three turns available. I could, of course, use a 20 MOA canted base which would take me almost exactly to the scopes mechanical zero and give me more elevation travel. Even so, the three turns give me enough elevation to reach around 800 yards which works for the shooting I do.
With an MSRP of $299, the Mueller 8-32×44 is hardly expensive in today’s optic market. It might be as much as many are willing to pay though, and for that price I think you’re getting very good performance.
I would happily run this scope on any of my factory varmint rifles or one of my deer rifles, though I tend to prefer lower magnifications for that purpose. But if you’re looking for a scope with a milling reticle, and target turrets to make fine corrections for a very good price, this one is worth a look.
Having used this scope now during various trips into the field I’ve come to appreciate what it can do. It gives a nice view of targets and the area around them, while giving a nice contrast against the reticle for precise aiming. The turrets are reliable and give accurate movements for corrections, all this while offering a low profile optic for a reasonable price.
If I could improve something about the scope it would likely be increasing the clarity brightness at maximum settings. To achieve that, though, I’m sure you’d need to incorporate lenses that cost significantly more. I’d also love to see a MIL/MIL version of the scope.
The Mueller Optics 8-32×44 tactical rifle scope is great combination of the consistent features shooters have come to know over the last few decades while giving solid optical performance for a scope in this price range. Good optics with consistent erector travel that give precise corrections and returns back to where it should. I think It would be a great option for an entry level precision rifle or a sharp-shooting hunting rifle.